

Premie size here. (Previously posted here as newborn size)
6-month size here.
9-12 month size here.
Hat should measure about 12" in circumference, and stretch to at least 14", for a newborn.
Supplies:
Worsted weight cotton yarn (I love this cotton)
5mm hook (H/8)
Tapestry needle (for sewing on flower)
Abbreviations:
Ch - chain
Dc - double crochet
YO - yarn over
Sl st - slip stitch
Tc - treble (or triple) crochet
Special Stitch:
Cluster -Make a dc within one step of finishing (2 loops left on hook). Repeat (3 loops left on hook), repeat (4 loops left on hook). YO, pull through all 4 loops on hook.
Round 1: Magic Ring. Inside the ring, ch 3. Make a dc within one step of finishing (2 loops left on hook). Repeat (3 loops left on hook). YO, pull through all 3 loops on hook. Ch 2. *Cluster, ch 2. Repeat from * three times. Pull ring tight. Sl st to top ch of ch 3. Sl st in next st, sl st in ch-2 sp. (5 clusters)
Round 2: Ch 3. In ch-2 sp, make a dc within one step of finishing (2 loops left on hook). Repeat (3 loops left on hook). YO, pull through all 3 loops on hook. Ch 2. In same sp, cluster, ch 2. *In the next ch-2 sp, cluster, ch 2.; cluster ch 2. Repeat from * in each ch-2 sp. Sl st to top ch of ch 3. Sl st in next st, sl st in ch-2 sp. (10 clusters)
Round 3: Ch 3. In ch-2 sp, make a dc within one step of finishing (2 loops left on hook). Repeat (3 loops left on hook). YO, pull through all 3 loops on hook. Ch 2. In same sp, cluster, ch 2. *In the next ch-2 sp, cluster, ch 2. In next ch-2 sp, [cluster, ch 2; cluster, ch 2.] Repeat from * around. (End on a single cluster in the sp.) Sl st to top ch of ch 3. Sl st in next st, sl st in ch-2 sp. (15 clusters)
Round 4-6: Ch 3. Make a dc within one step of finishing (2 loops left on hook). Repeat (3 loops left on hook). YO, pull through all 3 loops on hook. Ch 2. *In the next ch-2 sp, Cluster, ch 2. Repeat from * in each ch-2 sp. Sl st to top ch of ch 3. Sl st in next st, sl st in ch-2 sp. (15 clusters)
Round 7-11 or 12: Loosely sl st around in back loops only. Join, turn.
Finish with chs facing out. Finish off, weave in ends.
Six Petal Flower
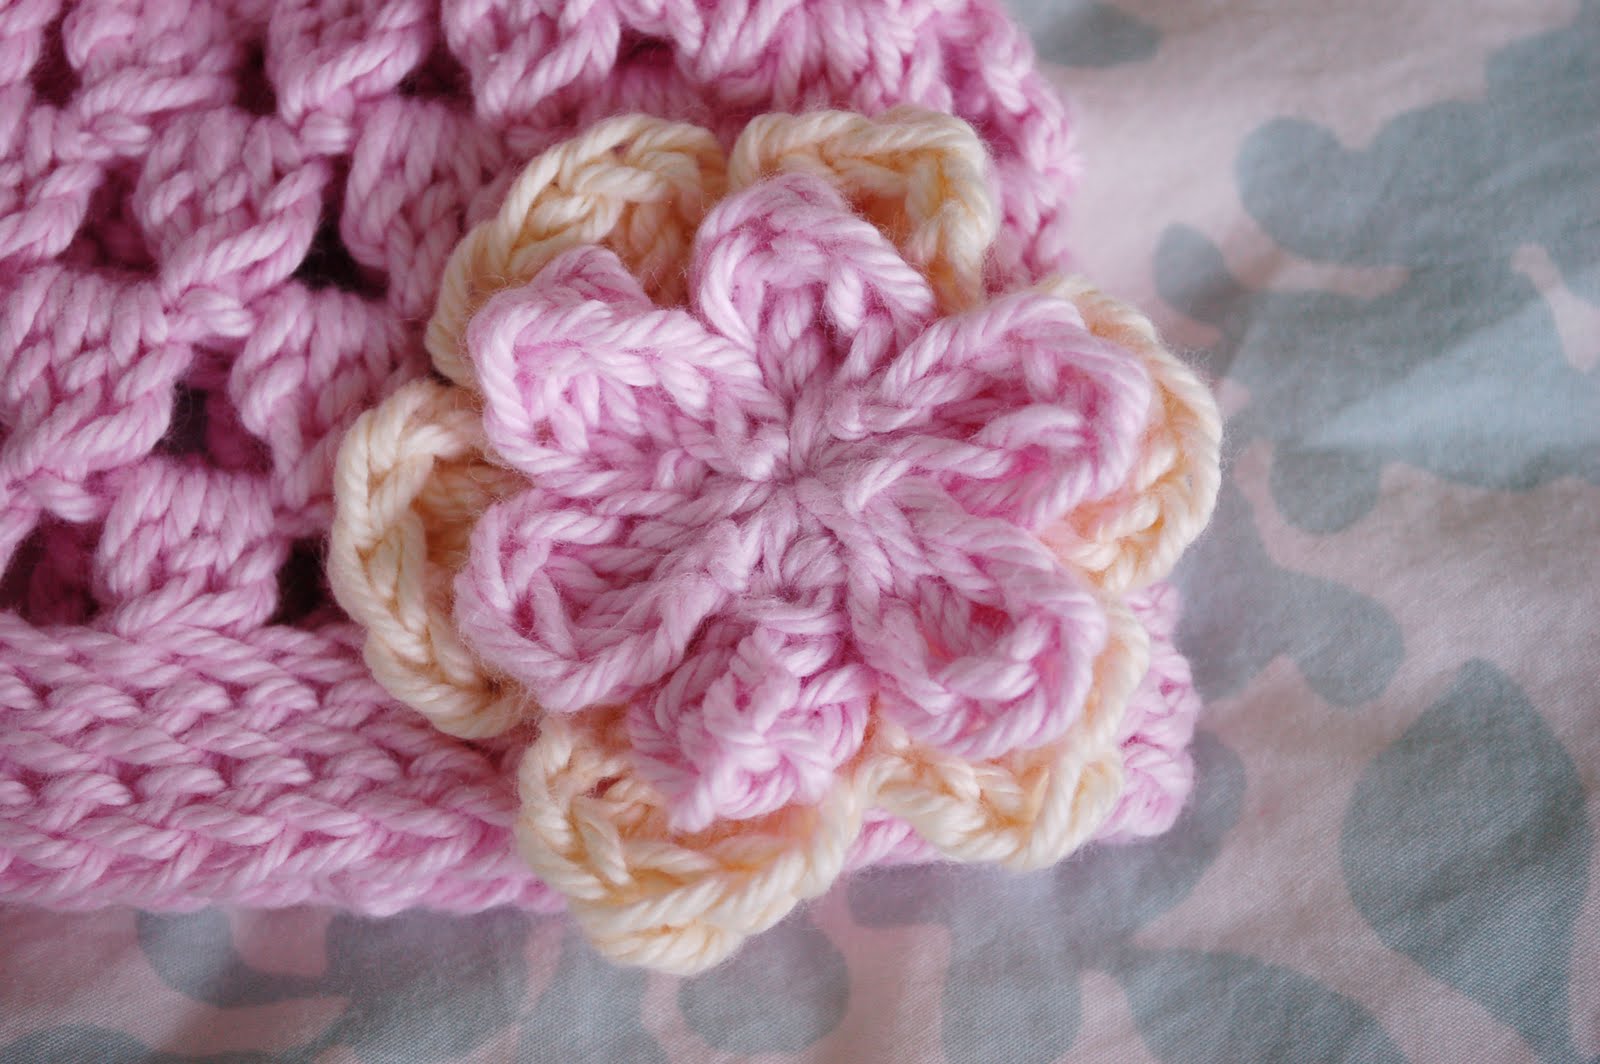
Big Flower:
Round 1: Magic Ring, ch 3. 12 dc. Pull ring tight, join with sl st to top ch of ch 3.
Round 2: *Ch 3. In next dc, [dc, tc, dc]. Ch 3, sl st in next dc. Repeat from * around.
Finish off', Weave in ends.
Small Flower:
Round 1: Magic Ring. In ring, *ch 3. #Make a tc within one step of completion (two loops left on hook. Repeat from # one time. YO, draw through all three loops. Ch 3, sl st to ring. Repeat from * five times. Join, finish off with a long tail, weave in first end.
Assembly: Using long tail of small flower, sew flowers together. Sew flower to hat.
©2011 Alli Hyer, all rights reserved. You may sell items you make with this crochet pattern, but if you sell them online, you must link to this crochet pattern. You may not sell this crochet pattern or claim it as your own. You may publish or post a link to this crochet pattern, but you may not publish or post this crochet pattern in whole or in part.
Very nice hat. I too have been making cluster stitch beanies for about a month now. Take a look at my blog a few posts back and let me know what you think. Love your blog and your great patterns. I've not written any out myself yet, but perhaps someday.
ReplyDeleteHave a great day.
Hi, reading over your blog I love all the hats, but I've never crocheted before so I'm obviously completely confused! I was just wondering if there's a kit at Hobby Lobby or another craft place that would get me started? I don't even know what the 5mm hook looks like or what a space or anything is, so any advice to get me started appreciated!
ReplyDeleteOliviasMom, there are lots of great ways to learn crochet out there! If you are a visual person, try going on YouTube, starting with a chain stitch, then learning a single crochet, then a double crochet. That will get you started! You can also learn to crochet from sites like lionbrand.com or crochetspot.com. You can go to a craft store or a walmart and ask a worker to get you set up with a size 5 hook and some worsted weight yarn. Or you can usually find learn-to-crochet kits in those places, too. Crochet is a fun hobby, and I'm sure you'll love it! :)
ReplyDeleteOliviasMom - I taught myself to crochet back in December from a book called "teach yourself crochet." It came with the hooks and everything! I loved it! I use youtube a lot and if you find patterns that have "as you go" photos those are a great help!
ReplyDeletePS. Alli - I love all your patterns! Please continue to post them. There are so many people out there who create and don't share! Thank you so much, you do amazing work!
This is super-cute...now I just need a newborn baby girl to make it for!!! =)
ReplyDeletelove this pattern but I can't get the hat any larger than 4 1/2 inch in diameter. Can someone explain why? I also don't know how to read the last part of instructions . What does row 7-9 or 10 mean
ReplyDeleteI crochet pretty loosely, so if you need to make it bigger, try making two clusters per space in the third row instead of two clusters in every other space.
ReplyDeleteAlso, the part of the instructions you are referring to is a repeat. You may need to add a row 10, but you may not need to, depending on how you slip stitch. You will be able to tell if you need one once you have completed row 9 - if the stitches are facing the outside of the hat, then you are done.
Thank You very much for answering my questions so promptly
ReplyDeleteHi Alli, I have been making and selling hats for friends and now said friends are having babies. they have been asking for baby hats while looking for patterns i came across your blog. i love your patterns! i used this pattern as a jump off point but tweaked the design. i plan on selling the finished hats on etsy, so even though there are a few differences, i'll still reference your blog :)
ReplyDeleteOk I may be a dumb dumb here but...How do you connect the flower rounds and place them on the hat? I am a beginner so Im trying to wing it.
ReplyDeleteMarshalls,
ReplyDeleteYou usually leave a long tail to sew it on with. If you have a tapestry needle (blunt-tipped with an eye big enough for yarn), you just thread the tail and use that, but if not you can use the crochet hook to sew. Use the tail to sew the two flowers together, then to the hat. This hat is a tough one to sew the flower on to because of the big spaces. I tacked the different petals to the top of the clusters so that it wouldn't stop the hat from stretching.
thanks so much for not only sharing your pattern but for responding to our questions!!
ReplyDeleteOliviasMom..and anyone else learning to crochet. I taught myself to crochet by watching Teresa Richardson's youTube videos. She is an excellent teacher and her videos are very easy to follow!.
ReplyDelete@Alli... I just found your site.. I will be stopping by more often. Love your hats!
i looove this pattern , I just finished a few newborn hats for some friends -- but i have a question . I have a 6 month old that i would love to make this hat for , how would I go about increasing the size ?
ReplyDeleteSpunkeypixie, so sorry I haven't responded until now! If you want to increase the size, you can start with 5 clusters, then do 2 clusters in every space for round 3. Like any hat, just keep doing increase rounds until it is big enough in circumference, then add rounds down until it is long enough. :)
ReplyDeleteThank you for this explanation. I have some patterns for pretty Christmas ornament ball covers that would actually make sweet little hats if larger. Now I know what to do to make that happen!
DeleteFor the slip stitching at the end do you have to turn after each row?? I'm not understanding it and it's very tight. Help!
ReplyDeleteAnonymous,
ReplyDeleteYou do turn each time, and you just slip stitch into the back loops of the previous slip stitches. You have to do it VERY loosely, it will probably feel unnatural. Like I said at the top, it should stretch to at least 14".
If you are having too much trouble with the slip stitching, you can do a few rows of sc around instead, which would be an easier way to finish off.
Hope it works out for you!
Alli
I am not able to open the cluster hat pattern for premies. Did you simply use a smaller hook to make the premie size?
ReplyDeleteI have enjoyed looking at your patterns. I love things that I can make quickly. The premie hats will be donated to a local Neonatal Intensive Care Unit. They are always in need of hats to keep the babies temperatures stable.
I followed the directions but the hats always come out small looking. Is there some way you could measure this hat and post the measurements so I can compare?
ReplyDeleteLOVE YOUR BLOG!
It should be about 12" around, but it should stretch to at least 14". And it should be about 5.5" from top to bottom.
ReplyDeleteAbout the premie hat, please try to access it again! It should work for you. It is a different pattern, with fewer clusters. I'm so glad to hear you are using your crochet skills for such a great cause!
ReplyDeletethis hat is sooo cute..i have been making them to donate to a birthing center..i went a little further and made blue hats for boys and crocheted little baseballs as accent..
ReplyDeleteI really don't crochet a lot and certainly not very well. I made this hat in less than 3 hours & it is so cute. Your instructions are great! I did have some trouble with the finishing rows but because the yarn I used was textured it is not noticable at all. I love your site. Will definately try a couple of other hats. Love the Magic Ring!
ReplyDeleteLove your blog, Made the hat today. Wish I could upload it for you, it turned out super cute!!!
ReplyDeleteI have a blog and I posted pics!!! My blog is called Random Thoughts... Check it out if want to she them! Thanks again!
ReplyDeleteI made one last night in less than 2.5 hours! And it only took me that long because I was doing other stuff as well! Love it! Thanks so much for sharing all your patterns, I'm sure I'll be making more soon! I will eventually blog about the hat and link it to here!! :)
ReplyDeleteA
Made this today in about an hour. Great pattern, very easy to understand and it came out to the exact measurements you stated. Made it in blue and put a pom pom on top instead of a flower. Super Cute! The only thing I did differently was I didn't turn while slip stitching. Nothing wrong with turning I just preferred the way it looked. Thanks
ReplyDeleteAlli, I LOVE this pattern...now I want to make this exact hat and I'm wishing for a baby girl. :) What is the yarn you said you loved that you showed me?
ReplyDeleteThanks!
Thanks! It's soooo soft, and it gets softer when you wash it. It's from Hobby Lobby; it's their store brand of cotton yarn called I Love This Cotton. If you don't have a Hobby Lobby, you can order it from their website. :)
ReplyDeleteGreat! Another question...I just got started and I'm confused: In the instructions for the clusters at the top it sounds like you're bringing through with 4 loops on your hook, but in the rest of the instructions it sounds like 3....should I do both as it's specific to each part of the instructions? If it says cluster, do 4, if it specifies, do 3?
ReplyDeleteRight. The first cluster is different from the rest of the ones in the round.
ReplyDeleteOooh...sorry...I think I figured it out: it's because of the chain 3? :)
ReplyDeleteLove this hat and I've been crocheting a long time, but I don't understand the magic ring?
ReplyDeleteClick on the words "magic ring," they will take you to a blog post that explains in detail with lots of pictures.
ReplyDeleteAny thoughts on how to alter this pattern to make it to fit a 3 year old? It's so cute and I would love to make one for my niece.
ReplyDeleteJAFS,
ReplyDeleteCheck out the Sizing Information and Increasing Sizes link at the top of the blog.
Also,
In this hat, at first you increase, then you "go straight down" by doing the same number of clusters around. For a larger hat, you will add more increase rounds, but you will do fewer increases in each successive round. Just as you do 2 clusters in every space, then 2 clusters every other space; you will follow that pattern to every third space and every fourth space, etc, until you have a large enough circle to mostly cover the crown of the head, or if you're working from a circumference measure, slightly less than the circumference of the head. Then you will "go straight down" by doing 1 cluster per space.
Hope that helps,
Alli
This comment has been removed by the author.
ReplyDeleteI just finished this pattern and it was great. The premie size was just right for a couple of doll hats that I tryied first before I did a couple bigger ones. Thanks for the pattern!!
ReplyDeleteThis is adorable! Just what I was looking for to crochet a hat for my new granddaughter. Thank you for sharing your pattern!
ReplyDeletei know how to make a magic ring by clicking on the instructions, but you say to chain 3 INSIDE the ring? how can you do that if the ring is closed already? and the instructions say to do 6 sc in the ring, i'm confused
ReplyDeleteon the slip stitch finishing rounds, i'm having trouble joining and turning, when i finish the last slip stitch in the round where do i join? and when i do join the working yarn is in the front not the back - confused :(
ReplyDeleteIt would be great if you could do a video on this hat, or at least the finishing rounds for us dummies
ReplyDeleteI figured out the magic ring and how to increase for the sizes. I still can't figure out the slipstitch finishing rounds, so i decided to just not turn it. Turned out great!
ReplyDeleteThe pattern is worked in continuous rounds with no turning. Glad it worked out for you!
ReplyDeleteI'm a beginner and reading patterns is a little difficult for me. In the 1st round you say pull ring tight. When I pull the ring tight, I just have 1 line of 5 clusters (the 1st cluster is in the magic ring but the rest are not) is this correct? After I pull the ring tight, I'm a little confused when you say sl st to top ch of ch 3 (do you mean the 3rd chain that I made in the magic ring?). Thanks!
ReplyDeleteThat's not right. You should make all the clusters of the first row inside the ring. Then when you pull it tight, it will be a circle. You will sl st to the ch 3 you made first.
ReplyDeleteI made this hat for my friends baby, but i would like to make a bigger one for when she out grows this one.I there a pattern for it or should I just try and wing it? Thanks
ReplyDeleteI love this site, thanks so much for the free patterns, they truly are amazing
ReplyDeleteLove your site.
ReplyDeleteA question about the cluster stitch, you describe the cluster as yarn over 4 loops on hook, then 3 loops on hook. Which one do you through out the pattern, 4 loops or 3 loops? I understand the first cluster with the chain 3, which would be a total of 4 loops on hook, but then after you are saying yarn over 3 loops.
I don't exactly understand the question, Diane, but when I say "cluster" in the pattern, I am referring to the cluster described in the "special stitch" section. If I write the instruction out in the pattern (as at the beginning of each round), then follow those special instructions for that cluster only.
ReplyDeleteHope that helps,
Alli
I just finished Round 2 with the 10 clusters. I am Reading Round 3 & I don't understand how you got 15 clusters.
ReplyDeleteRight now I am in my first Ch 2 space with my Ch 3, after I make my first cluster, how many spaces/chains to I move over to start the next cluster? It says Ch 2 sp but if I did every Ch 2 sp it would be more then 15 clusters?
Please help me figure out how to get 15 clusters in Round 3.
Having the same problem here too. Round 2 has 10 clusters I can't figure out how to do 15 clusters in round 3. Heeeeelp - A.
DeleteHi Alli, I am loving checking out your website! Thankyou. I too am having trouble understanding the last step Round 7-11. I dont know what back loops are so i dont know where to sl st. Did you end up making a video for this bit or is there somewhere on youtube i can watch this? I dont know what to type in as a search.
ReplyDeleteKeen to learn more about crocheting so dont want to cheat by doing sc instead.
thanks
Here's one that shows how... http://www.youtube.com/watch?v=phf7Nj0_LJg
ReplyDeleteI picked up a worsted weight soft acrylic yarn...will that still work or do I need to exchange? Also, how would I bump it up to 3 month size? Thank you for the cute patterns!
ReplyDeleteThat yarn should work beautifully. If you want to increase the size to a 3-6 month, I would guess, you will need to do another increase row, to bump it up to 20 clusters. So do two in the first, then one in the next two. Add another row of clusters, so you have 7 rows of clusters all together.
ReplyDeletei love all your patterns. they are easy to follow and are very pretty. thank you so much.
ReplyDeleteI love this hat. My sister is expecting her second girl in a few weeks so i made this hat for her. She has a four year old girl as well and loves to dress them alike, so i was wondering how to make this hat for her as well. Thanks
ReplyDeleteCheck out the Sizing Information and Increasing Sizes link at the top of the blog.
ReplyDeleteAlso,
In this hat, at first you increase, then you "go straight down" by doing the same number of clusters around. For a larger hat, you will add more increase rounds, but you will do fewer increases in each successive round. Just as you do 2 clusters in every space, then 2 clusters every other space; you will follow that pattern to every third space and every fourth space, etc, until you have a large enough circle to mostly cover the crown of the head, or if you're working from a circumference measure, slightly less than the circumference of the head. Then you will "go straight down" by doing 1 cluster per space.
Hope that helps,
Alli
Alli-
ReplyDeleteThanks for sharing your pattern. The first time I did it, my sl st were way too tight. And my first hat can nicely fit my daughter's doll (which she is thrilled about). But I am a chronic tight crocheter so I tried the pattern a second time and use sc instead of sl st for the last few rows and it has turned out perfectly! Thank you!
I adore this pattern! I have made one for myself and one for my baby girl who is due tomorrow. (: Now working on one for a vendor... we're trading her hair clips for my hat! This is too fun. Thanks so much!
ReplyDeleteJust had to thank you for this pattern. I do not often make baby things, but when I was asked, by a family member, took make a newborn heart I immediately thought of this pattern. If came out great!
ReplyDeleteHi Alli,
ReplyDeleteI was looking at your size guide and it suggested for newborns to have a hat height of 6"... When I completed this hat, it measures 4.75". Did the 6" include a roll that some hats have? Or should I continue the cluster for a few extra rows to make this hat 6"?
Thanks for these great patterns!
Hillary, I'd add a few extra rows. It should at least be 5.5. Glad you checked!
ReplyDeleteThanks!!
ReplyDeleteHi my name is Amanda. I absolutely adore this pattern! I was wondering how to ch 3 into the magic ring? I would love to make these to donate to a local women's pregnancy center if that is okay??
ReplyDeleteHi Amanda, follow the link to the Magic Ring tutorial and you'll see some pictures of how to do the magic ring technique. She uses a different pattern, but it will give you the general idea.
DeleteIt's awesome that you want to make them to donate to the pregnancy center! Please do!
I love this pattern! One question though-when you are doing your sl st's around the hat, what do you mean by join? Do you sl st in the first stitch you made, then turn? Thanks!
ReplyDeleteHello! I just found your blog today through Repeat Crafter Me (but I forgot how I did it). You make such beautiful items!! I love them all!! My friend just had her third baby today (2nd girl), so of course I started this hat right away!! I don't have cotton in the colors I want, I'm using Red Heart Super Saver & an H hook. This hat is soooooo small, are babies REALLY this tiny, lol? Love your patterns, thank you for sharing them!!
ReplyDeleteI have watched the tutorial on the magic ring, but don't understand how many stitches to do in the ring. 2) I don't understand where the slip stitch goes. I am 4 states away from two new unexpected preemie girl grandchildren.(7 weeks early) Crochet is one thing I can do.
ReplyDeleteAfter you make 3 ch stitches, you follow the instructions for the partial cluster, then you make 4 regular clusters. The first slip stitch goes in the third ch you made as you started the round, then you slip stitch over into the space between the clusters.
DeleteIf you'd rather stick with the traditional way to start a hat, you can just ch 3 or 4 and make a ring, then do the first round inside the ring.
Congratulations on your grand girls! Hope everything goes well for them.
I love this pattern and have used it for several hats that I have made. This last time, I did a little modifying that I thought I would share with you.
ReplyDeleteRow 6: DC across
Row 7-8: FPDC (insert hook from inside of hat and around the post and DC) across.
Row 9: Shell stitch *4DC in same st, skip st, SC, skip st* repeated across.
thanks for the pattern, I've tried to get it going twice this morning already but am really having a hard time with it. does anyone know of a tutorial out there with pictures or something that makes it a little more clear? I'm still semi new at crochet and this is my first cluster hat but I really feel like it shouldn't be that hard...
ReplyDeleteI love this pattern -- it finally forced me to learn to do a magic ring -- but I don't quite understand the very last line of the pattern. It says,
ReplyDelete"Finish with chs facing out. Finish off, weave in ends."
What do you mean by "chs facing out"? Do you mean that if extra rows of slip stitch are added, make sure the last row is done on the right side instead of the wrong side? Thanks!
I love this hat. So sweet. And the pattern for the flowers is the easiest flower I have ever made. Thank you so much for sharing!
ReplyDeleteThis is SO SO SO SO cute!! Thank you for sharing all these patterns, and I absolutely LOVE this one!! (and your color choices are gorgeous!) I've been looking for a free pattern for a bonnet, hat, or something else small that I can quickly crochet for a friend who's expecting a little girl. I don't know her that well, so I don't want to spend hours making something for her baby, but I want to make something, and this is perfect! I'll continue to come back if I need another baby shower gift ;)
ReplyDeleteWith gratitide,
Emmy
Bonjour, le chapeau avec la fleur magnifique! Avez-vous la diagramme ou le patron en français s.v.p ? Merci beaucoup
ReplyDeleteI adore your patterns, thank you! I've posted two on my most recent blog post here: http://www.myhellolovely.com/2014/07/22/crochet-cause-newborn-hats/. Would you mind if I did a tutorial on these as well?
ReplyDeleteIf you intend to include the entire pattern in the tutorial, then that is not allowed under my copyright. But if the visitors to your tutorial would have to come here to see the entire pattern then that would be fine.
Deletehi can someone explain the last bit of all the rounds where it refers to slip stitching in chain 3, slip stitch into bext stitch then slip stitching into chain 2 space? im a little confused as to what this means? thanks
ReplyDeleteLOVE THE CLUSTER HAT
ReplyDeleteGreat lightweight hat for spring and it took me less than 1 hour to make because I had flowers already made up.
ReplyDeleteBeautiful stitch, thank you for sharing. I just made the hat in Newborn size, turned out lovely I used white hat and light pink border, just one question - in the finishing rounds of slip stitch back loop it says “join and turn” I didn’t understand that so I just carried on working around the hat for 4 rows and I think it looks fine, did you mean to do that or join each row and turn?
ReplyDelete